Friday, July 5, 2013

How to make a Rice Bag

Pin It
Christmas in July with
The Quilt Ladies
Rice Bag

This is one of the things you think you will NEVER need or want  ! ! 
I need it and I want it. 
Make one for everyone and for yourself. 

It's simple white non-cooked rice in a bag, warm it in the Microwave and you have a heating pad. I use it all year around.


I like to use Flannel, but cotton and fleece work too
Cut  8 Flannel Squares - 2 7/8" x 2 7/8"
Cut 2 Cotton Squares 2 7/8' x 2 7/8"

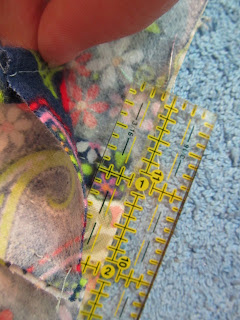
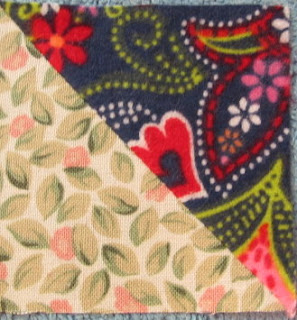
Make Triangles - How to HERE
how to make a rice bag tutorial

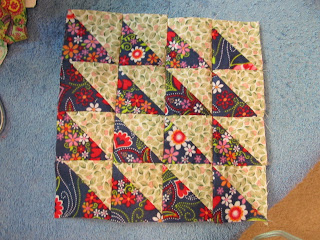
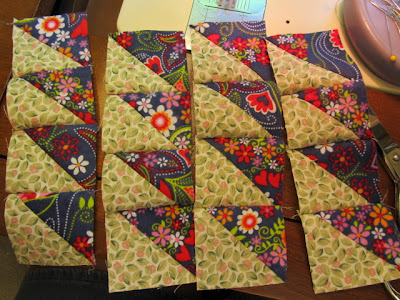
You will have 16 squares


how to make a rice bag

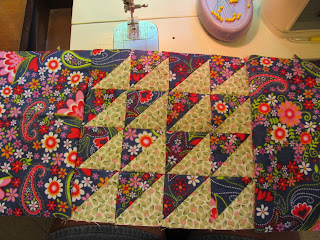
Piece them into 4 rows, 4 in each row.

how to make a rice bag tutorial

Sew the rows together.
The Quilt Ladies Patterns


For the Rice Bag

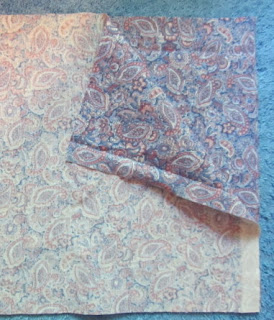
Cut a piece of fabric 9" x 28" 
Fold in half and press

how to make a rice bag

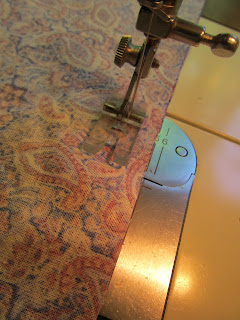
Sew both of the long sides together,


Using a 5/8" seam allowance


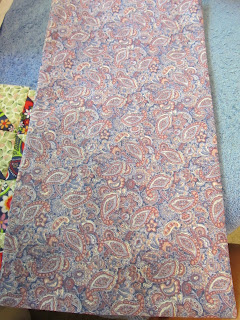
Turn the bag right side out, pull corners out and press

making a rice bag

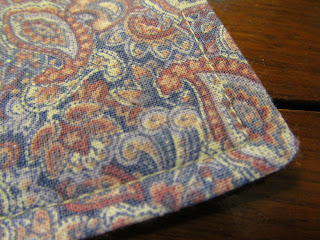
Top Stitch 1/4" around sides, and bottom.

Fill bag with rice. (I use the cheapest I can find)

I put 6 Cuts of White right in mine (try it and add what you like)


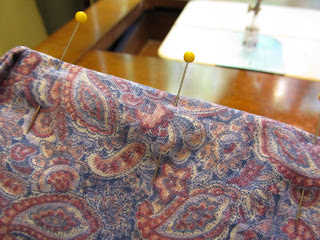
Turn in the top edge and pin and top stitch across the top.
Mine is turned in about 2 inches. I like it firm.

how to make a rice bag

Cut 2 Flannel pieced 12" x 8 1/2" 
(if you didn't make you bag as firm add fabric to length here)

Sew one to each side


Press the edge under and fold over, press.

Top Stitch both sides.

how to make a rice bag tutorial

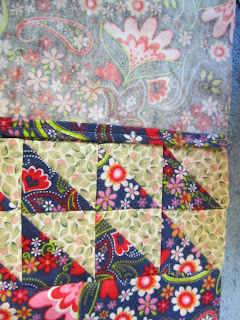
Fold one of the edges, right side to right side over to the center of the patchwork.


Fold the other edge over 1 1/4" and sew both of the sides closed.


Turn bag right side out.


Fill Flannel bag with Rice Bag


You can add a Velcro here to hold closed, BUT I leave it open,
so my foot can get inside of it in.... NOTHING better.

tutorial of how to make a rice bag

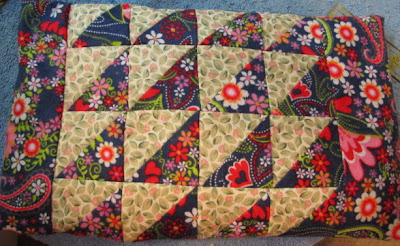
The Finished Rice Bag.

HAPPY Christmas IN July


The Quilt Ladies Store Logo
I am the Author of The Quilt Ladies Book Collection
and Little Quilt Ladies Quilt Patterns


Monday, July 1, 2013

Free Quilt Block Pattern from The Quilt Ladies

Pin It
I'm breaking quilt blocks down. May look hard, but give it a chance, you can do this quilt block.

Mother's Fancy Star Quilt Block
this is what I call this block, it has LOTS of names

14" x 14"
tutorial on how to make a star quilt pattern


free star quilt patternCut 1 White – 4 ½” x 4 ½”
Cut 4 White – 4 ½” x 2 ½”

Cut 12 White – 2 ½” x 2 ½”

Cut 20 Green – 1 ½” x 1 ½”
Cut 16 White – 1 ½” x 1 ½”

Cut 4 Green – 1 ½” x 8 ½”

Cut 8 White – 1 ½” x 8 ½”

 Breaking the Piecing down


How to piece a star quilt pattern


Cut 4 White – 4 ½” x 2 ½”

Cut 8 Green – 2 ½” x 2 ½”

Sew as shown – 4 times


Cut 1 White – 4 ½” x 4 ½”
Cut 4 White – 2 ½” x 2 ½”
Sew rows together as shown

How to piece a star quilt pattern

free star quilt pattern
Center Star

Cut 2 Green – 1 ½” x 8 ½”
Cut 4 White – 1 ½” x 8 ½”

Sew as shown and add to the star sides

How to piece a star quilt pattern

How to piece a star quilt pattern
Block Center

 9- patch corners
Cut 20 Green – 1 ½” x 1 ½”
Cut 16 White – 1 ½” x 1 ½”
(I changed my color to red, see block)

Sew together as shown – 4 times

How to piece a star quilt pattern

Cut 2 Green – 1 ½” x 8 ½”
Cut 4 White – 1 ½” x 8 ½”


Sew as shown add 9-patch on the outside – 2 rows
Sew rows into quilt block

How to piece a star quilt pattern


Finished Block
How to piece a star quilt pattern


Change the colors around and have fun with this block

Example 1

Example 2


tutorial on how to make a star quilt pattern


Read about All of Beth Ann’s Books


Beth Ann is a Quilter and an Author
who decided to self-publish her books and quilt pattern books

SEE Beth Ann’s BOOKS on Amazon and
PDF download quilt patterns on Etsy

www.bethanndoing.com
www.thequiltladies.com


Friday, June 28, 2013

Made an Ikea Trip

Pin It
I've had over 4 years of dreaming and decorating our home, I have a notebook full of ideas, Pinterest pages of nothing but decoration and I knew just what I wanted. 
And yes, this book unit is ALL about ME !
We made an Ikea trip to Tampa, FL. and had a BALL !


After taking the dresser away, this is how the wall looked.


Bookcase and Husband


They went together very well and we didn't have too many ???? 


Just about done

Ikea white bookcase

I'm still moving things around a bit, but it's just as I planned.

Beth is the Author of The Quilt Ladies Book Collection
and Little Quilt Ladies Quilt Patterns


Monday, June 24, 2013

Friday Free Quilt Pattern from The Quilt Ladies

Pin It

King's Highway Quilt Block Pattern

24" x 24" This is a big quilt block and it's fun and easy to sew together. Make four of the quilt block and you have a perfect baby or lap quilt. 

how to piece a quilt block

I used scraps from my fabric closet for this block, 
the placement of color was random

Finished Block


Finished Block

Cut 48 Assorted Colors – 2 ½” x 2 ½”

Cut 4 Lt. Blue – 4 ½” x 6 ½”

Cut 8 Black – 4 ½” x 2 ½”
Cut 16 Black – 6 ½” x 2 ½”


 Breaking the quilt block down

Make 4 of this block
9 squares per block
Cut 28 Assorted Colors – 2 ½” x 2 ½”


The block center row

Cut 4 Assorted Colors – 2 ½” x 2 ½”

Cut 4 Black – 4 ½” x 2 ½”

Cut 2 Lt. Blue – 4 ½” x 6 ½”


Top and Bottom row – Do 2 Rows

Cut 8 Black – 6 ½” x 2 ½”

Cut 2 Lt. Blue – 4 ½” x 6 ½”


Border Rows – Do 4

Cut 16 Assorted Colors – 2 ½” x 2 ½”

Cut 4 Black – 4 ½” x 2 ½”
Cut 8 Black – 6 ½” x 2 ½”


Sew rows together as shown


Finished Quilt Block

how to piece a quilt block


Read about All of Beth Ann’s Books


Beth Ann is a Quilter and an Author who decided to self-publish her books and quilt pattern books

SEE Beth Ann’s BOOKS on Amazon and
PDF download quilt patterns on Etsy

www.bethanndoing.com
www.thequiltladies.com


Tuesday, June 18, 2013

Painted Dresser - Furniture Project

Pin It
We had almost 3 weeks before our things arrived, so we had time to get things moved out, floors cleaned and new carpet down. Just making it ours, not a rental unit.

I had NOT done a paint project in MONTHS and I jumped in to do this one. 


painting an old dresser
This is the dresser before, it was in the living room.

It is a solid piece of furniture and it's been painted before, was 
in Grand #3's nursery. 


Just did a light sanding.


Used the same hardware, painted


The drawers are a black satin enamel


The body is a white OIL. I love oil, it has just a bit of a shine


Hardware and fronts


Now it's my dresser in our bedroom


The Quilt Ladies Store Logo
I am the Author of The Quilt Ladies Book Collection
and Little Quilt Ladies Quilt Patterns
Related Posts Plugin for WordPress, Blogger...