Showing posts with label Quilt Tutorial. Show all posts

Wednesday, June 15, 2011

How to Make a Square Quilt with only SQUARE'S, Part 2

Pin It
If you missed a few weeks ago, HERE's our start of the quilt.

Now that you have your 16 blocks finished it’s time to do some arranging. I lay mine out, 4 cross and 4 down. I used to lay them out on the floor, at one house I had a felt wall but with age I lay them out on my bed, I like the white so that nothing takes away from my pieces. bethanndoing.com

How to Make a Square Quilt with only SQUARE'S

Now is the time to move them around, so that you like the placement.

Cut  40 (mine soft gray) – 2 1/2” x 6 1/2”

Piece the border piece between each quilt block, for each row


How to Make a Square Quilt with only SQUARE'S, Part 2

Inside borders.

Take one 2 1/2” x 2 1/2” Square,  add 2 1/2” x 6 1/2” keep doing this until your row looks like this.

Nine patch quilt blocks
Do this ROW as above 5 times, using different colored squares, making no row the same.

How to Make a Square Quilt with only SQUARE'S

Piece the border to each row, and row the rows together.
How to Make a Square Quilt with only SQUARE'S, Part 2

When you finish all the rows you will have the center of the quilt.


Nine patch quilt blocksHow to Make a Square Quilt with only SQUARE'S, Part 2 Nine patch quilt blocks

I'll give you a couple of weeks and we'll finished up with the outside borders then.


I am the Author of The Quilt Ladies Book Collection
and Little Quilt Ladies Quilt Patterns


Wednesday, June 1, 2011

How to make a Square Quilt with ONLY Squares

Pin It

Received a phone call from a very dear friend who’s taken the plunge and is learning how to quilt.  HERE – is how she started. The next question is, “How do I do a quilt top? ”

I know when you see a finished quilt it can seem very overwhelming. I’m going to walk you thought making a quilt top over the next few weeks.

Remember, “It’s Only a Square”    Finished Quilt Size:  46”x 46”  1 yard of each color will be more than needed to do this project.

Cut  160 – 2 1/2” x 2 1/2” in assortment of colors (I used a dark, medium and light) approx. 1 yard of each color !

It's ONLY a Square, How to make a Square Quilt with ONLY Squares

Lay out each block before sewing it together, there is no right way or no wrong way. I’ve included some examples of color placement, these are examples, have fun move colors around and you will need 16 blocks.  Use a ¼” seam allowance and press your seams to one side. 

How to make a Square Quilt with ONLY SquaresHow to make a Square Quilt with ONLY Squares
Lay out 3 in each row
And do 3 rows.

You will need a total of 16 pieced block, so have fun, move color around, here is just a few examples:


Take a few weeks and I'll walk you through putting the block together with sashing and borders, let's say 2 weeks ! Keep checking back !


So, get the fabric out, get cutting, piecing and let's make a quilt top  !


Be Kind to all,  
Beth


Thank you for supporting my Etsy shop and my Quilt Ladies Book on Kindle and Nook, nothing is possible without your purchases, Beth
The Quilt Ladies ONLY on Kindle and NOOK


Saturday, November 20, 2010

Removing a Stain from an Old Quilt

Pin It
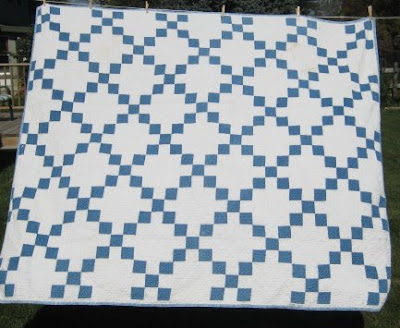
Even when you do everything right,  this is what can happen. This is one of my old garage sale finds and one of the first quilts I get out when we have a chill in the air.
Removing a Stain from an Old Quilt
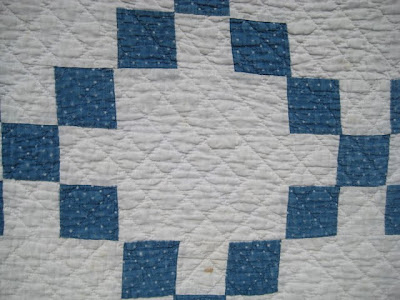
To my surprise, this is what I unfolded and found.   I think this quilt was $20 at a garage sale, the outside border was a mess and I cut that all off and put new binding on it and it's been used and washed for 10 years plus.  I store it in acid free tissue and then in a white 100% cotton pillowcase, like them all.   So, I figured I'd see if I could fix it.


Removing a Stain from an Old Quilt

I made a paste of liquid laundry detergent and non-chlorine all fabric bleach. I know some of you just gasped, but I know me and if it was there, it would drive me NUTS.  Laying it out on the kitchen counter, I wet the section, and working in my mixture, and let it set for some time. Rinsed it well and washed it on gentle and the pictures are the quilt drying on the clothes line.


Removing a Stain from an Old Quilt

The side with the stain was in the full sun for the day and as you can see, it looks wonderful. bethanndoing.com


Removing a Stain from an Old Quilt

I would say the quilt is from the 50's, machine pieced and hand quilted wonderfully, at the writing of this, I'm at the computer and it's over my lap, I have an old friend back with me.

Sew Happy, 

I am the Author of The Quilt Ladies Book Collection
and Little Quilt Ladies Quilt Patterns

Sunday, February 28, 2010

How to Pick your Quilt Colors by The Quilt Ladies

Pin It
“How do you see color going together?”

I answered very quickly, “You just see it.” But the question has stayed with me. So, I have broken down how I do it.


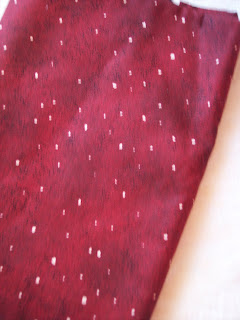
Pick your Quilt Colors by The Quilt Ladies1) Start with one fabric. Take this one fabric and work from it. Is that one fabric, a dark, medium or light color?


This is a Dark


Pick your Quilt Colors by The Quilt Ladies


Add the light and medium. Move and change it until you like it.
Lay them out in front of you.


How to Pick your Quilt Colors by The Quilt LadiesThen add, a dark medium, a light medium, until you have the mix of what you like.


2) Choose colors and patterns you love. An average a twin size quilt will take me about a week to piece together, and if hand quilted another, 3-4 months. If tied or machine quilted 3-4 weeks, you have so much time and cost involved you have to love it.

3) Natural or background colors. These are the corner stone. More often than notPick your Quilt Colors by The Quilt Ladies the background color is your light color. Your background color helps bring the blocks together. It does not always need to be a light either, dark or medium work well to, any color can be used.

4) Color Wheel. I’m not a big fan of the color wheel, I do like when colors pops and on most of my quilts the start fabric is not the most prominent color used it in, it is just a starting point.

5) Make one block. This should always be done, a Quilters practice, cut only fabric for one block and live with it for a few days. Especially, if it’s something you’ve never tried before. Most times you will know right away if you like it or not.

6) Have fun. This is the best way to ensure quilt success, when you enjoy the process, your quilt will be fantastic.


Beth
Beth is the Author of The Quilt Ladies Book Collection
and Little Quilt Ladies Pattern Series 
The Quilt Ladies Store


Related Posts Plugin for WordPress, Blogger...