Showing posts with label Basic Quilting HOW to's. Show all posts

Wednesday, September 30, 2015

How to Put Quilt Fabric Colors Together

Pin It
Question “How do you see quilt fabric colors going together?”

I answered very quickly, “You just see it.” 

But the question has stayed with me.
 So, I have broken down how I do it.
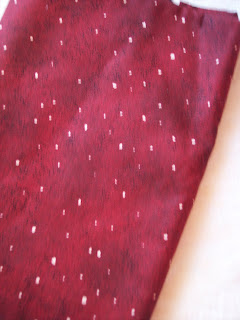

Pick your Quilt Colors by The Quilt Ladies1) Start with one fabric. Take this one fabric and work from it. Is that one fabric, a dark, medium or light color?


This is a Dark


Pick your Quilt Colors by The Quilt Ladies


Add the light and medium. Move and change it until you like it.
Lay them out in front of you.


Pick your Quilt Fabric Colors by The Quilt Ladies


Then add, a dark medium, a light medium, until you have the mix of what you like.


2) Choose colors and patterns you love. An average a twin size quilt will take me about a week to piece together, and if hand quilted another, 3-4 months. If tied or machine quilted 3-4 weeks, you have so much time and cost involved you have to love it.


3) Natural or background colors. These are the corner stone. More often than notPick your Quilt Colors by The Quilt Ladies the background color is your light color. Your background color helps bring the blocks together. It does not always need to be a light either, dark or medium work well to, any color can be used.

4) Color Wheel. I’m not a big fan of the color wheel, I do like when colors pops and on most of my quilts the start fabric is not the most prominent color used it in, it is just a starting point.

5) Make one block. This should always be done, a Quilters practice, cut only fabric for one block and live with it for a few days. Especially, if it’s something you’ve never tried before. Most times you will know right away if you like it or not.

6) Have fun. This is the best way to ensure quilt success, when you enjoy the process, your quilt will be fantastic.

Monday, August 31, 2015

Make a Quilt Triangle with The Quilt Ladies

Pin It

How to Make a Quilt Triangle

Just like the square if you are not ready to purchase a rotary cutter and mat. You will need to make a freezer paper pattern.  How to do Square's HERE

Take the FINISHED size of the square you want and add 7/8 of an inch.
example:
for a finished size 2 inch square you will cut your fabric 2 7/8" x 2 7/8"
for a finished size 3 inch square you will cut your fabric 3 7/8" x 3 7/8"

for a finished size 4 inch square you will cut your fabric 4 7/8" x 4 7/8"

And so on, either make you freezer paper pattern or up with a rotary cutter and ruler.


Tutorial to make a quilt triangle


I've used a 3 inch FINISHED Square cut 3 7/8" x 3 7/8"

A light and a dark.


How to make a quilt triangle
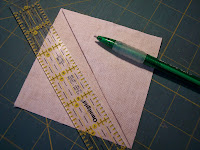
On the Wrong side of the light fabric draw a line from corner to corner.


This is the cutting line NOT sewing line


How to make a quilt triangle

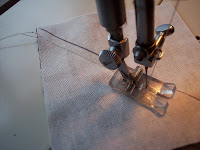
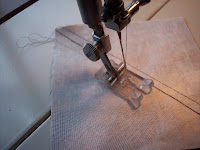
On your sewing machine sew a straight seam, 1/4" from the line.


How to make a quilt triangleTurn and do the same thing on the other side.

(when I have many to sew, I do chain piecing, one right after another, not stopping the machine until all finished and then turn and do the other side)

If NEW do them one at a time.


Tutorial to make a quilt triangle
Cut on the drawn Cutting line.


You have 2 triangles


Open them up and 2 triangles


How to make a quilt triangle


Press your seam to the dark fabric and trim the end tail off.


How to make a quilt triangle
This is your finished triangle


GIVE IT A TRY.... IT'S NOT HARD.


I recently posted a block on Facebook and there was a lot of take about points.

Here's how I do it.


how to not cut off triangle points in quilting

Pieced together a triangle to a block


how to not cut off triangle points in quilting

Added this as a strip to another piece.  Pin as much as you need, check as you pin to make sure
you have the 1/4 seam allowance. 


how to not cut off triangle points in quilting

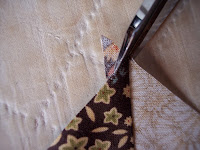
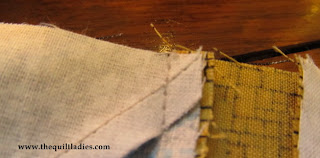
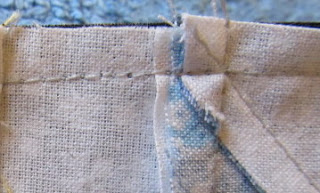
On this seam I had to move the needle in just 2 threads to make the point perfect.

Press the fabric 


how to not cut off triangle points in quilting

The point. 

Thursday, August 27, 2015

How to Quilt, Freezer Paper Quilt Patterns, How to Piece a Quilt Square

Pin It

How to start quilting


Always remember that quilting has been done for hundreds of years and all the new gadgets are great.

You can still do things very simply and fill your sewing closet with new innovations as your talent grows.

No need to purchase a rotary cutter and mat your first time out. Take your time and enjoy.
Things needed to start a quilt project:


A sewing machine that sews a straight line, borrow one or purchase one at a large chain store. No need to spend hundreds on a machine to straight stitch. OR
Hand piecing can be done too. Everything is the same as a machine, but you hand stitch using the same ¼" seam allowance.


How to Start Quilting with The Quilt Ladies1)Graph Paper
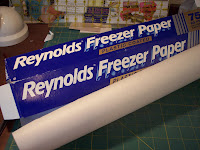
2)Freezer Paper – Plastic coated paper, like the butcher’s wrap meat in. You can purchase it at your local store or if you ask they may give you some at your butcher counter
3)Glue stick
4)Iron
5)Gray thread
6)Ruler
7)Pencil
8)Basic sewing supplies, Scissors, thimble, sew riper, etc.
9)Needles – for hand piecing Sharps size 7-12, for quilting Between needles size 10-12
10)Sewing Pins
11) Fabric and Batting


Fabric – The best rule of thumb is to purchase the best fabric you can afford. Always 100% cotton. Avoid loose woven fabrics. Wash cotton to check for color fast and iron if needed. If new to quilting it is always best to start with a light and dark color.

How to Start Quilting with The Quilt LadiesCutting – Rotary cutter, mat and ruler can be used if you have them. If you are new to quilting and are not sure you want to buy all these supplies try Freezer paper. It may be purchased at any grocery store. You will notice that one side is shiny, one not.
Draw the pattern pieces on to graph paper, the finished
size, the - - - line. The - - - - will be the sewing line


Add a ¼ inch seam allowance around the entire outside edge –the cutting line
(example – 2 inch finished size cut square 2 ½" x 2 ½") Cut pattern out
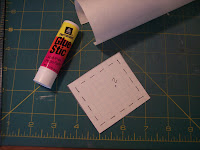
With a glue stick. Paste the pieces to How to Start Quilting with The Quilt Ladiesthe NON-shiny side of the freezer paper.

Cut the pattern out.


You can now iron the pattern to your fabric, shiny side down.
This pattern can be used over and over. It will leave no film on your How to Start Quilting with The Quilt Ladiesfabric.


Square -
Cut 2 squares the same size (finished size of square plus 1/2 inch) example cut 2 ½ x 2 Good to good Fabric
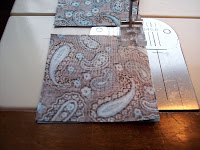
¼ inch seam allowance, sew
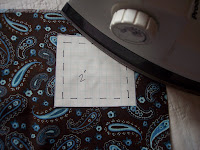
Trim threads
Open and Press to the dark

How to Start Quilting with The Quilt Ladies


1)sew seam with a 1/4 inch seam allowance,
you may need to mark your machine with this measurement.


The Quilt Ladies Store


2) You can chain piece a few at a time


Cut thread and open


How to Start Quilting with The Quilt Ladies


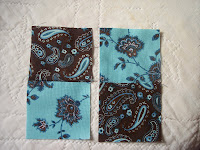
3)sew these together
How to Start Quilting with The Quilt Ladies
Watch your color placement, sew good side to good side.


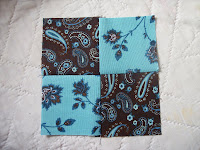
4) A 4-patch quilt square
How to Start Quilting with The Quilt Ladies


Read about All of Beth Ann’s Books
Beth Ann is a Quilter and an Author who decided to self-publish her books and quilt pattern books
SEE Beth Ann’s BOOKS on Amazon and
PDF download quilt patterns on Etsy
www.bethanndoing.com
www.thequiltladies.com


Wednesday, June 3, 2015

Quilt, Hand Quilted and All Done

Pin It

I've been hand quilting for quite a bit on this, it's what I've been taking to my Monday quilt group and it's now all done.

When I was teaching this is my beginner's quilt 5 week class, the class would have been 2 1/2" squares, I cut mine down for a table topper size.

Table Topper Quilt, by The Quilt Ladies

HERE is my binding tutorial for you 
On a regular size quilt, I would cut my binding strips 2 1/2" wide, but on this little one, I cut them 1 1/4" wide.
I like, little quilts to have little binding.

Table Topper Quilt, by The Quilt Ladies

All the sewing is the same, 1/4" seam allowance.


Tutorial on how to add quilt binding to a quilt.

But, I like to trim the backing and batting about in half.

Quilt binding tutorial

This is before the binding is turned and sewn down. You can turn it under and see what you like before trimming around the entire quilt.  I like to hand sew the binding down, I can get the corners, better and yes, you will have to mess with them a bit to get them perfect, they are VERY tiny. 

The Before

The After
Have to LOVE hand quilting ! 

Table Topper Quilt, by The Quilt Ladies


Wednesday, September 17, 2014

Learning to Quilt - Basic Information

Pin It

Here is some information that is nice to have when you start quilting, the need to knows.

simple quilt pattern block

Basic Quilt Making Information
Standard Cut Sizes of Fabric
Fat Quarter – 18” x 22”
Fat Eighth – 9” x 22”
Fat Sixteenth – 4 ½” x 22”

1 Yards is 36” x 44" to 45”(width may be different per fabric company)

Standard Mattress Sizes
Crib – 23’ x 46’ or 28” x 52”
Twin Single – 39” x 75”
Double/Full – 54” x 75”
Queen – 60” x 80”
King – 76” x 80” or 78” x 80”

Standard Batting Sizes
Crib Size – 45’ x 60”
Twin – 72” x 90”
Double/Full – 81” x 96”
Queen – 90” x 108”
King 120” x 120”


There are MANY ways to piece quilt blocks, I'm sharing the way I like to do it.
Cut 2 – 2 ½” x 2 ½” squares the same size (finished size of square plus 1/2 inch)
Good to good Fabric
¼ inch seam allowance, sew
Trim threads
Open and Press to the dark 
Cut 2- 2 7/8” x 2 7/8” Squares
(finished size plus 7/8”)
Good to good fabric, with a pencil draw a line corner to corner, this is
The line you measure your ¼” seam allowance from
Sew from edge to edge use a ¼” seam
Cut in half on the pencil line, trim threads
Open and press to the dark fabric,
There will be 2 blocks 

Cutting Chart for Half-Square Triangles


SEE all The Quilt Ladies NEW Posts - SIGN UP NOW
Below and Top Right

Wednesday, August 6, 2014

Make Picking Fabric Colors for a Quilt Quick

Pin It

I'm a bit overwhelmed with all the attention this post received and I'm pleased to show you it really works ! 

B Annie Quilt Pattern eBook by the Quilt Ladies
This is one of the quilt rows, 
choosing fabrics this way !

This may seem a bit strange, but I love the colors in this dress and it's how I picked the colors for my quilt Pattern Book  

B. Annie HERE

quilt fabrics from a photo in vogue
(photo from Vogue and I've had it for a while)

Can you see it?
 The purples, the pink/red sleeve, the green top

http://www.shop.thequiltladies.com

And a White added for the white Chair ! 

www.shop.thequiltladies.com

The Quilt Ladies Store


The only color that just didn't work for me was the black belt and I couldn't find anything I liked, so I just left it off.
(Note: when piecing the blocks the dark green took the place of the black)
If you'd LIKE the pattern - HERE it is

Here's a look at one of the 16 blocks ! 
It worked ! 
http://www.shop.thequiltladies.com/product.sc?productId=78&categoryId=37


Beth Ann
The Quilt Ladies Book Collection  ONLY on Kindle and NOOK

My new book on KINDLE and NOW in PRINT TOO 


This post may contain affiliate links. I will receive a few cents if you click to their site and purchase
Thank you for supporting my Etsy shop and my Quilt Ladies Book on Kindle and Nook,
nothing is possible without your purchases, Thank You


Related Posts Plugin for WordPress, Blogger...