Showing posts with label Quilt tips. Show all posts

Monday, January 21, 2013

Self-Binding Quilt Tutorial

Pin It
Self-Binding Quilt Tutorial
Self Binding means: 
Bring the quilt backing to the front and using it as your binding

MY SELF-BINDING TUTORIAL HAS BEEN MOVED TO MY NEW SITE  WWW.bethanndoing.com
CLICK HERE AND YOU WILL BE TAKEN RIGHT TO IT 

Step by Step How to do Self Binding on a Quilt

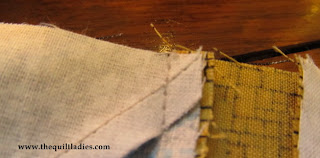
Trim the batting even with your quilt top
Stop over the purchase a Quilt Pattern for yourself ! 


The Quilt Ladies NOW on Kindle and NOOK

The Quilt Ladies quilt stories and quilt patterns


Beth Ann Strub is a Quilter,
Quilt Designer, Book Author, Painter, Wife, Mother and Grandma

 The Quilt Ladies Quilt Pattern Shop on Etsy

 The Quilt Ladies in Print and eBook

Read about ALL my Books in Print

Purchase Now with PRIME - My NOW in PRINT Books

This post may contain affiliate links. I will receive a few cents if you click to the site and purchase
#quilt #quilting #thequiltladies #patchwork #bethanndoing #quilts #needlework


I am the Author of The Quilt Ladies Book Collection
and Little Quilt Ladies Quilt Patterns

Tuesday, October 25, 2011

Bias Tape the OLD Fashion Way

Pin It
Bias Tape is NOT hard to make, you will need 

2 Straight Pins
1 Piece of fabric cut 1" x 3" approx - Holding Strip

The strip you will make into bias tape, I cut mine large to show, normal cut will be 
3/4" to 1 1/4" wide. 

A dry Iron  and Ironing board. bethanndoing.com


Bias Tape the OLD Fashion Way


How to make Bias Tape

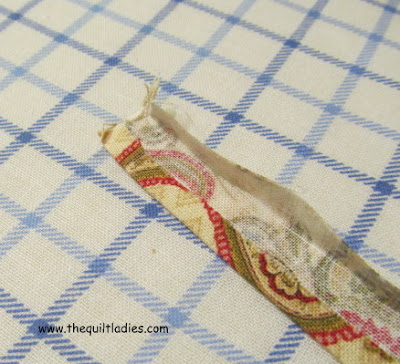
Iron over your edges, 1/8" to 1/4" and Press


How to make Bias Tape the OLD Fashion Way

Do both sides


How to make Bias Tape


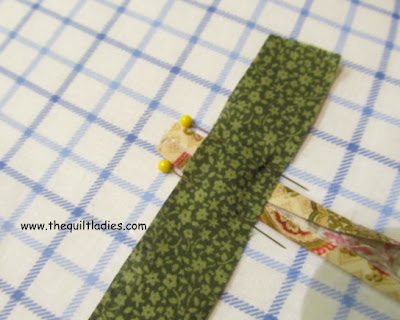
Lay your started binding down, press side up.
Take your Holding Strip and lay on top, Pin into your ironing board cover next to the bias tape.


How to make Bias Tape the OLD Fashion Way

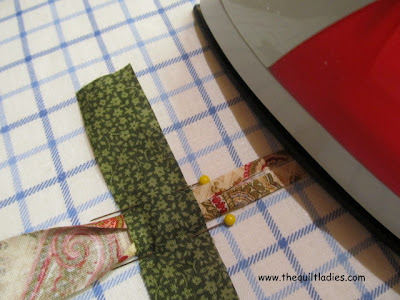
Pull the bias tape


How to make Bias Tape

And, with a hot, dry iron press, at first do a bit, and lift iron, pull and iron.


How to make Bias Tape the OLD Fashion Way

As the tape becomes longer you can leave the iron and pull slowly.
(Other side view)


How to make Bias Tape the OLD Fashion Way

Pull tape slowly
How to make Bias Tape

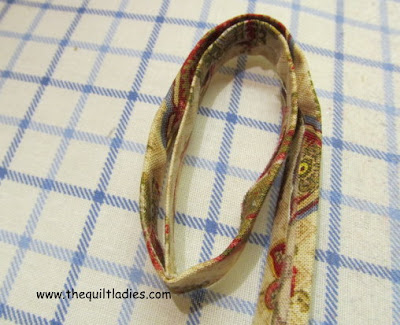
Good side of bias tape.


How to make Bias Tape

I like to roll mine  to keep it until I'm ready to use it.
I learned this years ago from a Home Eco. teacher in the 70's
No need to buy a machine to do this for you !  But, you can if you like !

I am the Author of The Quilt Ladies Book Collection
and Little Quilt Ladies Quilt Patterns

Tuesday, June 21, 2011

Quilt Ladies - Quilting Tips

Pin It

I use my rotary cutter only when I’m standing. I can see the ruler lines better and I seem to be more accurate with my strip cutting.  
Beth


Wednesday, June 8, 2011

Hand Quilting - Quilt Tips from The Quilt Ladies

Pin It

I love hand piecing, usually a small project, but there is something about it that makes me happy. When you hand piece  do as you would do on the sewing machine, using a continuous stitch, make a knot at one end of the thread, stitch your sew allowance to the end, do a back stitch and start stitching again on the next patch.

The Quilt Ladies Store of Quilt Patterns and Quilt Books

bethanndoing.com

Monday, June 6, 2011

Quilting Tips from The Quilt Ladies

Pin It

When designing and drafting your own patterns, remember to add ¼” inch on each side of the block before cutting:

2 inch finished square will be cut 2 ½” x 2 ½”
3 inch finished square will be cut 3 ½” x 3 ½” 

and so on !


The Quilt Ladies Store of Quilt Patterns and Quilt Books

Beth is the Author of The Quilt Ladies Book Collection

Saturday, November 20, 2010

Removing a Stain from an Old Quilt

Pin It
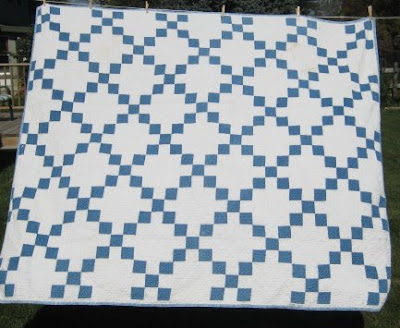
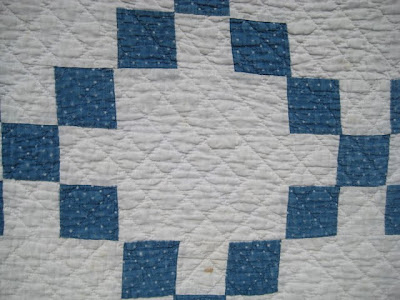
Even when you do everything right,  this is what can happen. This is one of my old garage sale finds and one of the first quilts I get out when we have a chill in the air.
Removing a Stain from an Old Quilt
To my surprise, this is what I unfolded and found.   I think this quilt was $20 at a garage sale, the outside border was a mess and I cut that all off and put new binding on it and it's been used and washed for 10 years plus.  I store it in acid free tissue and then in a white 100% cotton pillowcase, like them all.   So, I figured I'd see if I could fix it.


Removing a Stain from an Old Quilt

I made a paste of liquid laundry detergent and non-chlorine all fabric bleach. I know some of you just gasped, but I know me and if it was there, it would drive me NUTS.  Laying it out on the kitchen counter, I wet the section, and working in my mixture, and let it set for some time. Rinsed it well and washed it on gentle and the pictures are the quilt drying on the clothes line.


Removing a Stain from an Old Quilt

The side with the stain was in the full sun for the day and as you can see, it looks wonderful. bethanndoing.com


Removing a Stain from an Old Quilt

I would say the quilt is from the 50's, machine pieced and hand quilted wonderfully, at the writing of this, I'm at the computer and it's over my lap, I have an old friend back with me.

Sew Happy, 

I am the Author of The Quilt Ladies Book Collection
and Little Quilt Ladies Quilt Patterns

Thursday, November 12, 2009

Quilters Triangles, How To Make with Triangles with Seven-Eighth Inch Squares

Pin It
The next step is the triangle. Just like the square if you are not ready to purchase a rotary cutter and mat. You will need to make a freezer paper pattern.  How to do Square's HERE

Take the FINISHED size of the square you want and add 7/8 of an inch.
example:
for a finished size 2 inch square you will cut your fabric 2 7/8" x 2 7/8"
for a finished size 3 inch square you will cut your fabric 3 7/8" x 3 7/8"

for a finished size 4 inch square you will cut your fabric 4 7/8" x 4 7/8"

And so on, either make you freezer paper pattern or up with a rotary cutter and ruler.


Quilters Triangles, How To Make with Seven, Eighth Inch Squares


I've used a 3 inch FINISHED Square cut 3 7/8" x 3 7/8"

A light and a dark.


Quilters Triangles, How To Make with Seven, Eighth Inch Squares
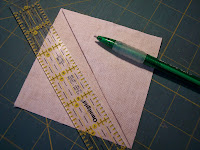
On the Wrong side of the light fabric draw a line from corner to corner.


This is the cutting line NOT sewing line


Quilters Triangles, How To Make with Seven, Eighth Inch Squares

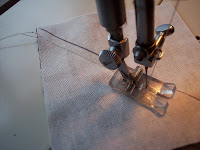
On your sewing machine sew a straight seam, 1/4" from the line.


Quilters Triangles, How To Make with Seven, Eighth Inch SquaresTurn and do the same thing on the other side.

(when I have many to sew, I do chain piecing, one right after another, not stopping the machine until all finished and then turn and do the other side)

If NEW do them one at a time.


Quilters Triangles, How To Make with Seven, Eighth Inch Squares
Cut on the drawn Cutting line.


You have 2 triangles


Quilters Triangles, How To Make with Seven, Eighth Inch Squares


Open them up and 2 triangles


Quilters Triangles, How To Make with Seven, Eighth Inch Squares


Press your seam to the dark fabric and trim the end tail off.


Quilters Triangles, How To Make with Seven, Eighth Inch Squares
This is your finished triangle


GIVE IT A TRY.... IT'S NOT HARD.


I recently posted a block on Facebook and there was a lot of take about points.

Here's how I do it.

Quilters Triangles, How To Make with Seven, Eighth Inch Squares

Pieced together a triangle to a block


Quilters Triangles, How To Make with Seven, Eighth Inch Squares

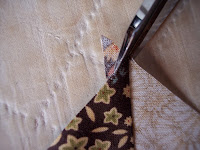
Added this as a strip to another piece.  Pin as much as you need, check as you pin to make sure
you have the 1/4 seam allowance. 


Quilters Triangles, How To Make with Seven, Eighth Inch Squares

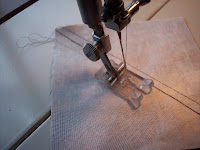
On this seam I had to move the needle in just 2 threads to make the point perfect.

Press the fabric 


Quilters Triangles, How To Make with Seven, Eighth Inch Squares

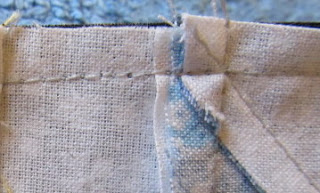
The point.   bethanndoing.com

I am the Author of The Quilt Ladies Book Collection
and Little Quilt Ladies Quilt Patterns
Related Posts Plugin for WordPress, Blogger...